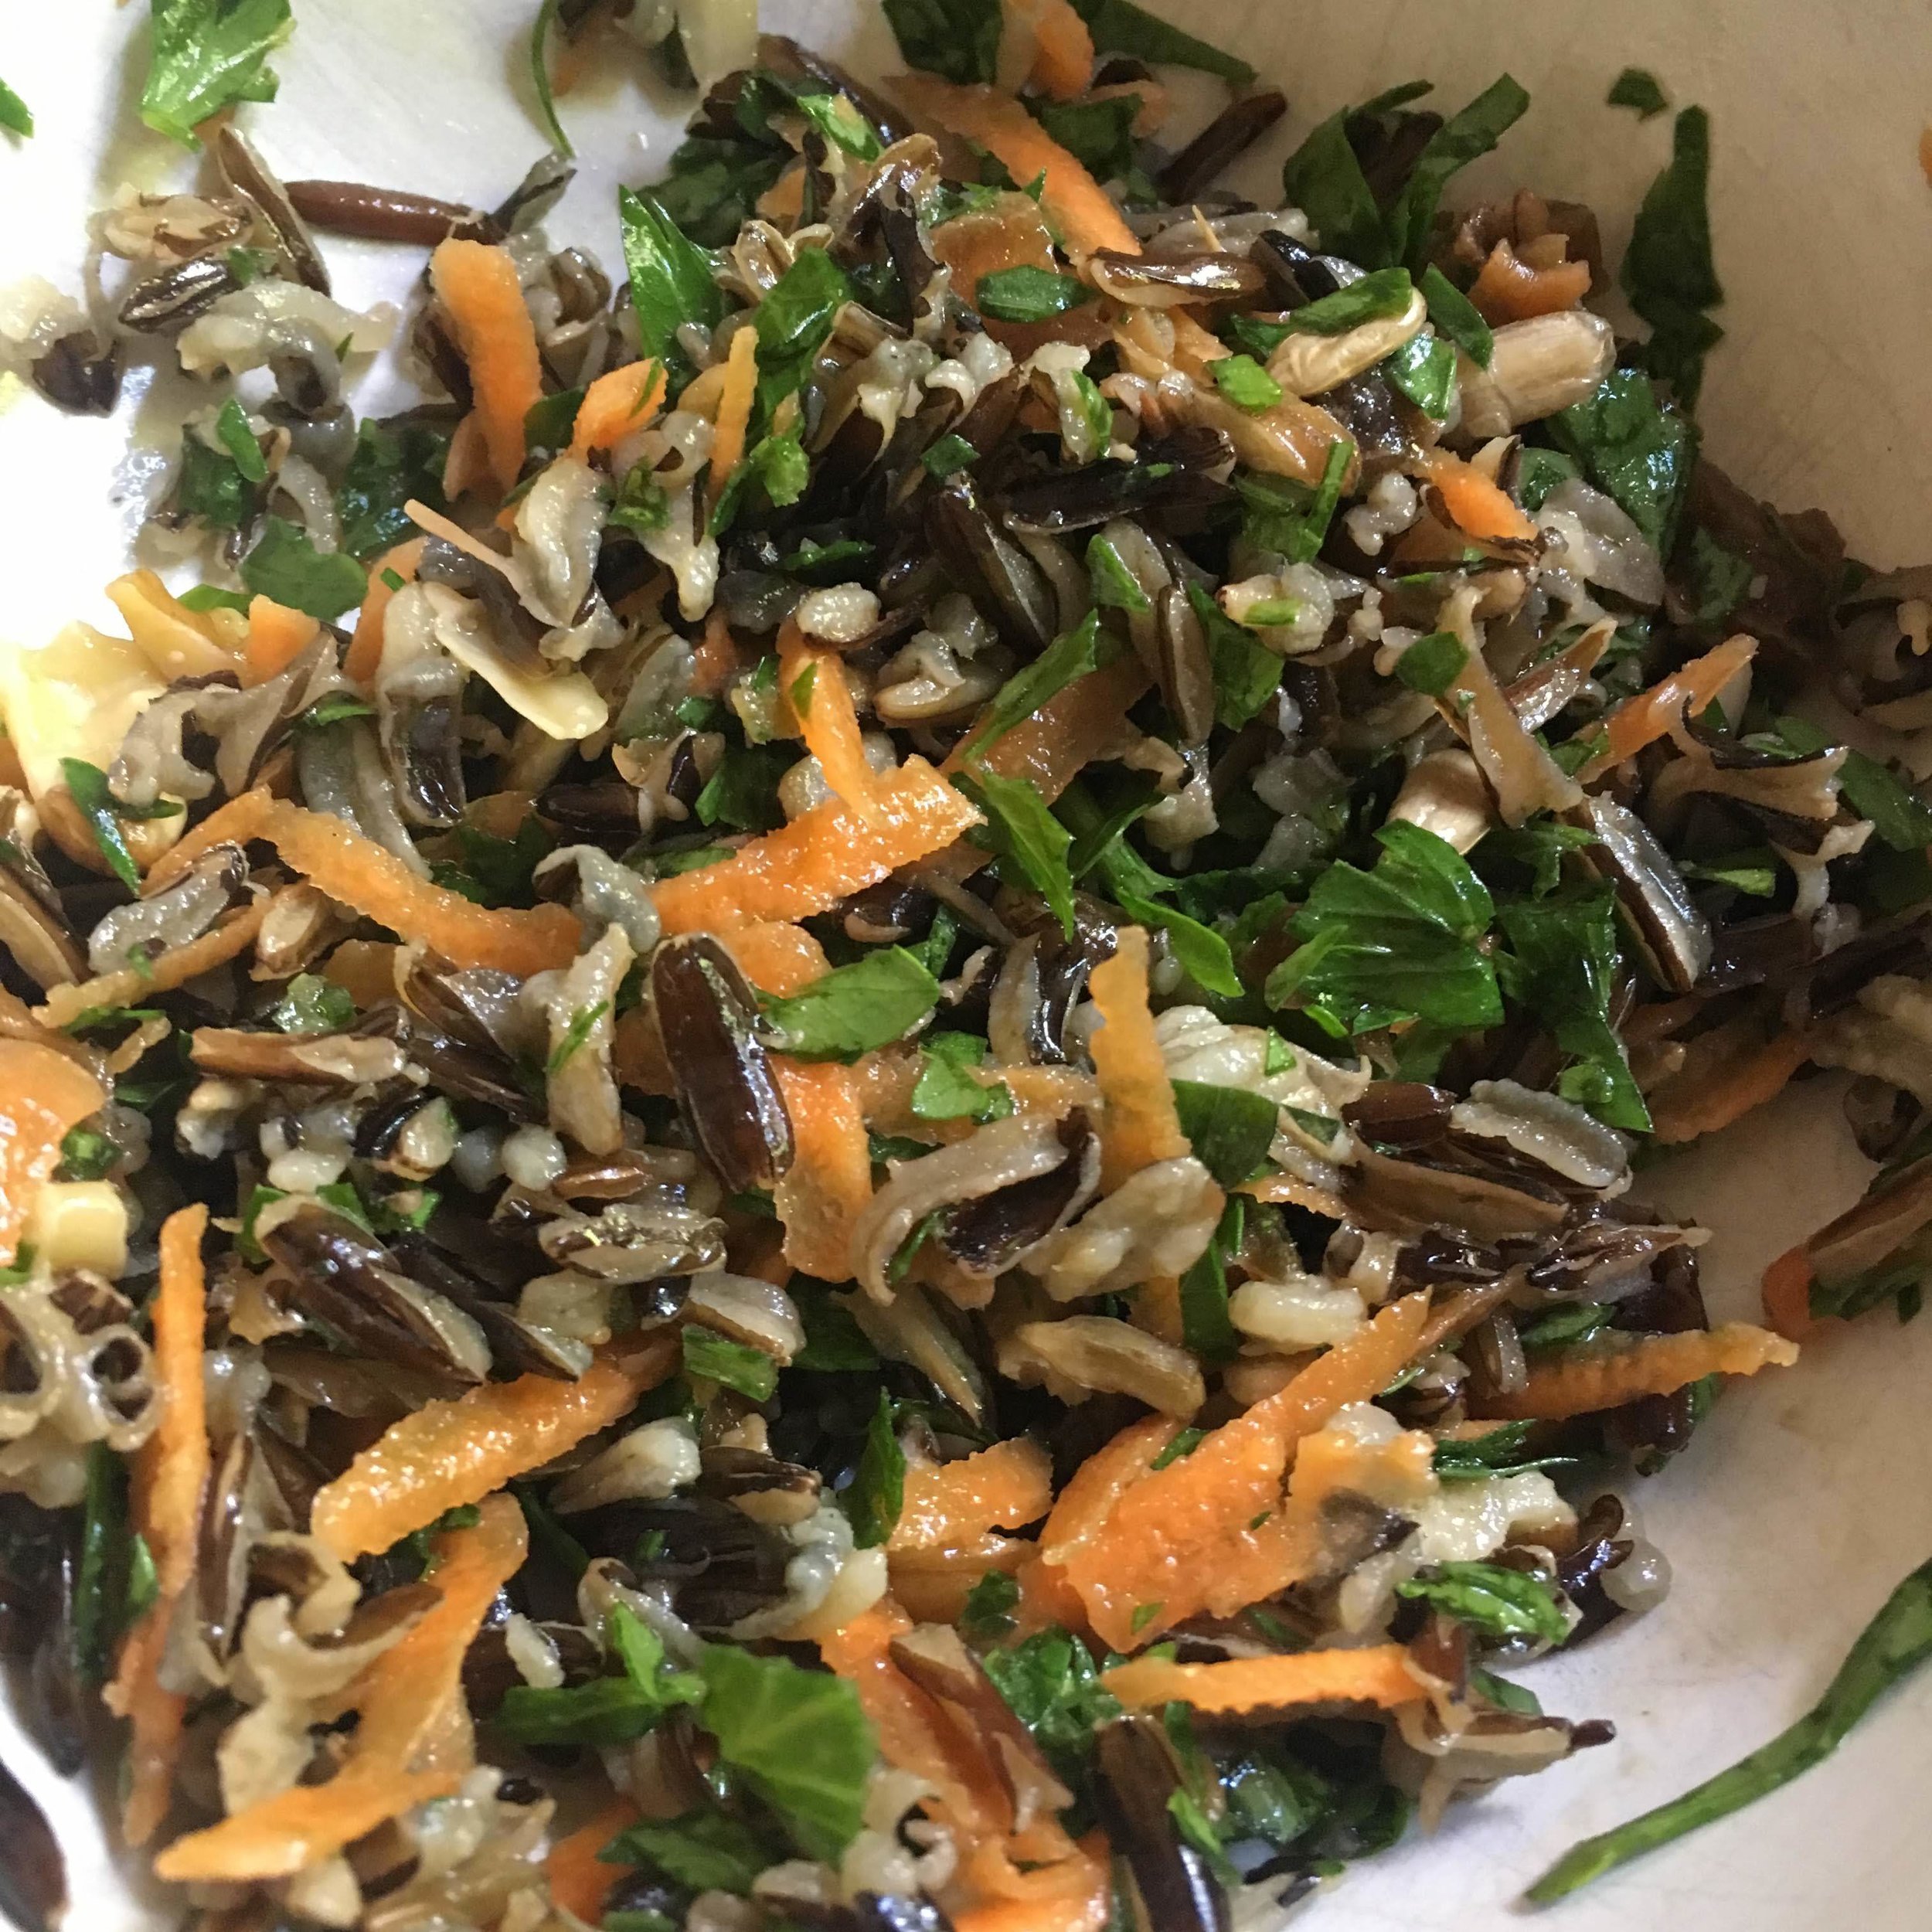
Apricot Mint Wild Rice Salad

I have always been curious about wild rice, but it seemed so unricelike in so many ways to my Taiwanese mind. It’s more nutty, more fibrous, and turns out…. it’s fabulous.  It’s great eaten cold. After a friend made a wild rice salad for dinner one day, I was won over. Enough so that I wanted to put a recipe up!

According to Rebecca Wood in her book, “The New Whole Foods Encyclopedia,”  wild rice is native to North America, originally found around the Great Lakes Region.  (It turns out global warming and more frequent floods are making natural harvesting harder.) Wild rice is a cooling and drying food, which for me is great to eat when I’m feeling overheated or hot.  There are some “hand harvested” wild rice varieties out there, which are usually pricier, but often go towards supporting native peoples.  A google search will pull up small businesses that offer online sales of hand harvested wild rice.

Nutritionally, wild rice is high in zinc, high in protein for a grain, and a great fiber source.  Plus it’s easy to make, and since it can be eaten cold, you can take it with you for lunch or a quick snack.  Gotta make sure you chew a bunch cause it’s fibrous!

This recipe has apricots in it, they can be substituted with any dried fruit (currants, raisins, mulberries, it’s up to you!) If apricots sound good to you, buy natural un-sulfured apricots instead of the orange ones which are treated with sulfur dioxide. Store any unused in the freezer or eat them within a month or so.


Wild Rice Salad with Apricots and Mint

Wild Rice Salad

Wild Rice Salad

(makes 4 servings)

1 cup wild rice

3 cups filtered water

2 tablespoons extra virgin olive oil

1 tablespoon rice wine vinegar

1/2 cup of grated carrots

1/2 cup of chopped parsley

1/2 cup of crushed walnuts (or other nuts/seeds)

½ cup of dried unsulfured apricots (the brown kind)

1 fistful of finely chopped mint

Sea salt and pepper to taste


Directions:

  1. Place 1 cup of wild rice and 3 cups of filtered water into a saucepan.  Cover with a lid and bring to a simmer. Simmer for around 45 minutes until kernals pop open.  Turn off heat and allow to sit with the lid ON for 10-15 minutes.

  2. After the rice has cooled (you can make it on a different day even), mix with the rest of the ingredients.  

  3. Taste.  Add more of any ingredient!  Sometimes I like more apricots, and maybe I’ll add some feta cheese if it’s around.

  4. Serve!  Feel free to double the recipe if you are taking it to a potluck.  Enjoy…..



Comforting Borscht Soup

IMG_1410.JPG

I was reminded recently of this recipe in The Nourished Belly Diet, and being deep January in Berkeley (which, yes it’s cold here, particularly because houses in Northern California do NOT have great insulation) this is the perfect recipe. Borscht has an interesting history. I had always associated Borscht with Russia, but it was originally created in what is now Ukraine, was made with a parsnip rather than red beetroots, and in later forms also had a bit of a tangy taste due to some fermentation. It’s a good reminder to add a bit of sauerkraut to add some tanginess and some healthy probiotics. Borscht was also originally associated with peasant food, which as I dive deeper into traditional healthy foods, it’s always those with little means that instinctively knew how to make foods that held deep nutrition.

The first time I made this soup, I was working on a farm on the central coast of California and one of my roommates was a Russian girl named Liz. Although she had spent much of her childhood in the Bay Area, she still had a strong connection with her roots. I’m grateful to her for helping me adapt this simple recipe. Beets are extremely nutrient rich, and their beautiful magenta color is a sign of that, although you could use golden beets as well. Beets are full of minerals, are great for the liver, and they add a natural sweetness that most palates enjoy. It’s hard to mess up, and you can throw in just about anything you have in your fridge.

Ingredients

(feeds 8)  

1–2 pounds beef shank or short ribs

1 pat butter or beef tallow (optional)

1 medium yellow onion, sliced

2 medium potatoes, chopped

2 cups sliced cabbage

4 medium beets, chopped

4 carrots, chopped

½ 24-ounce jar stewed tomatoes

1 teaspoon apple cider vinegar

sea salt and black pepper, to taste


For the optional garnish:

(mixed together or separate)

½ cup minced parsley

½ cup green onions

½ cup yogurt or sour cream

½ cup sauerkraut


Directions:

1) If using a Crock-Pot, before going to bed, place the beef shank or short ribs in the Crock-Pot and cover with water. Turn on low.  If using the stovetop, place the beef shank or short ribs in a large stockpot and cover with water. Cover with a lid and simmer for about 1 hour.

2) Optional: Sauté vegetables for added flavor in a pat of butter or beef tallow.

Or, skip step 4 and add the onion, potatoes, cabbage, beets, and carrots straight to the stockpot or Crock-Pot.

3) Add the tomatoes.

4) If using a Crock-Pot, set it on low for at least 4–6 hours and you are free to leave the house!

5) If using a stockpot, simmer on low for roughly 50 minutes. When a fork goes through beets easily, it’s done!

6) Add salt and pepper.

7) Serve with parsley, green onions, yogurt or sour cream and sauerkraut, if using. Mix the garnishes together or use them separately, as desired.


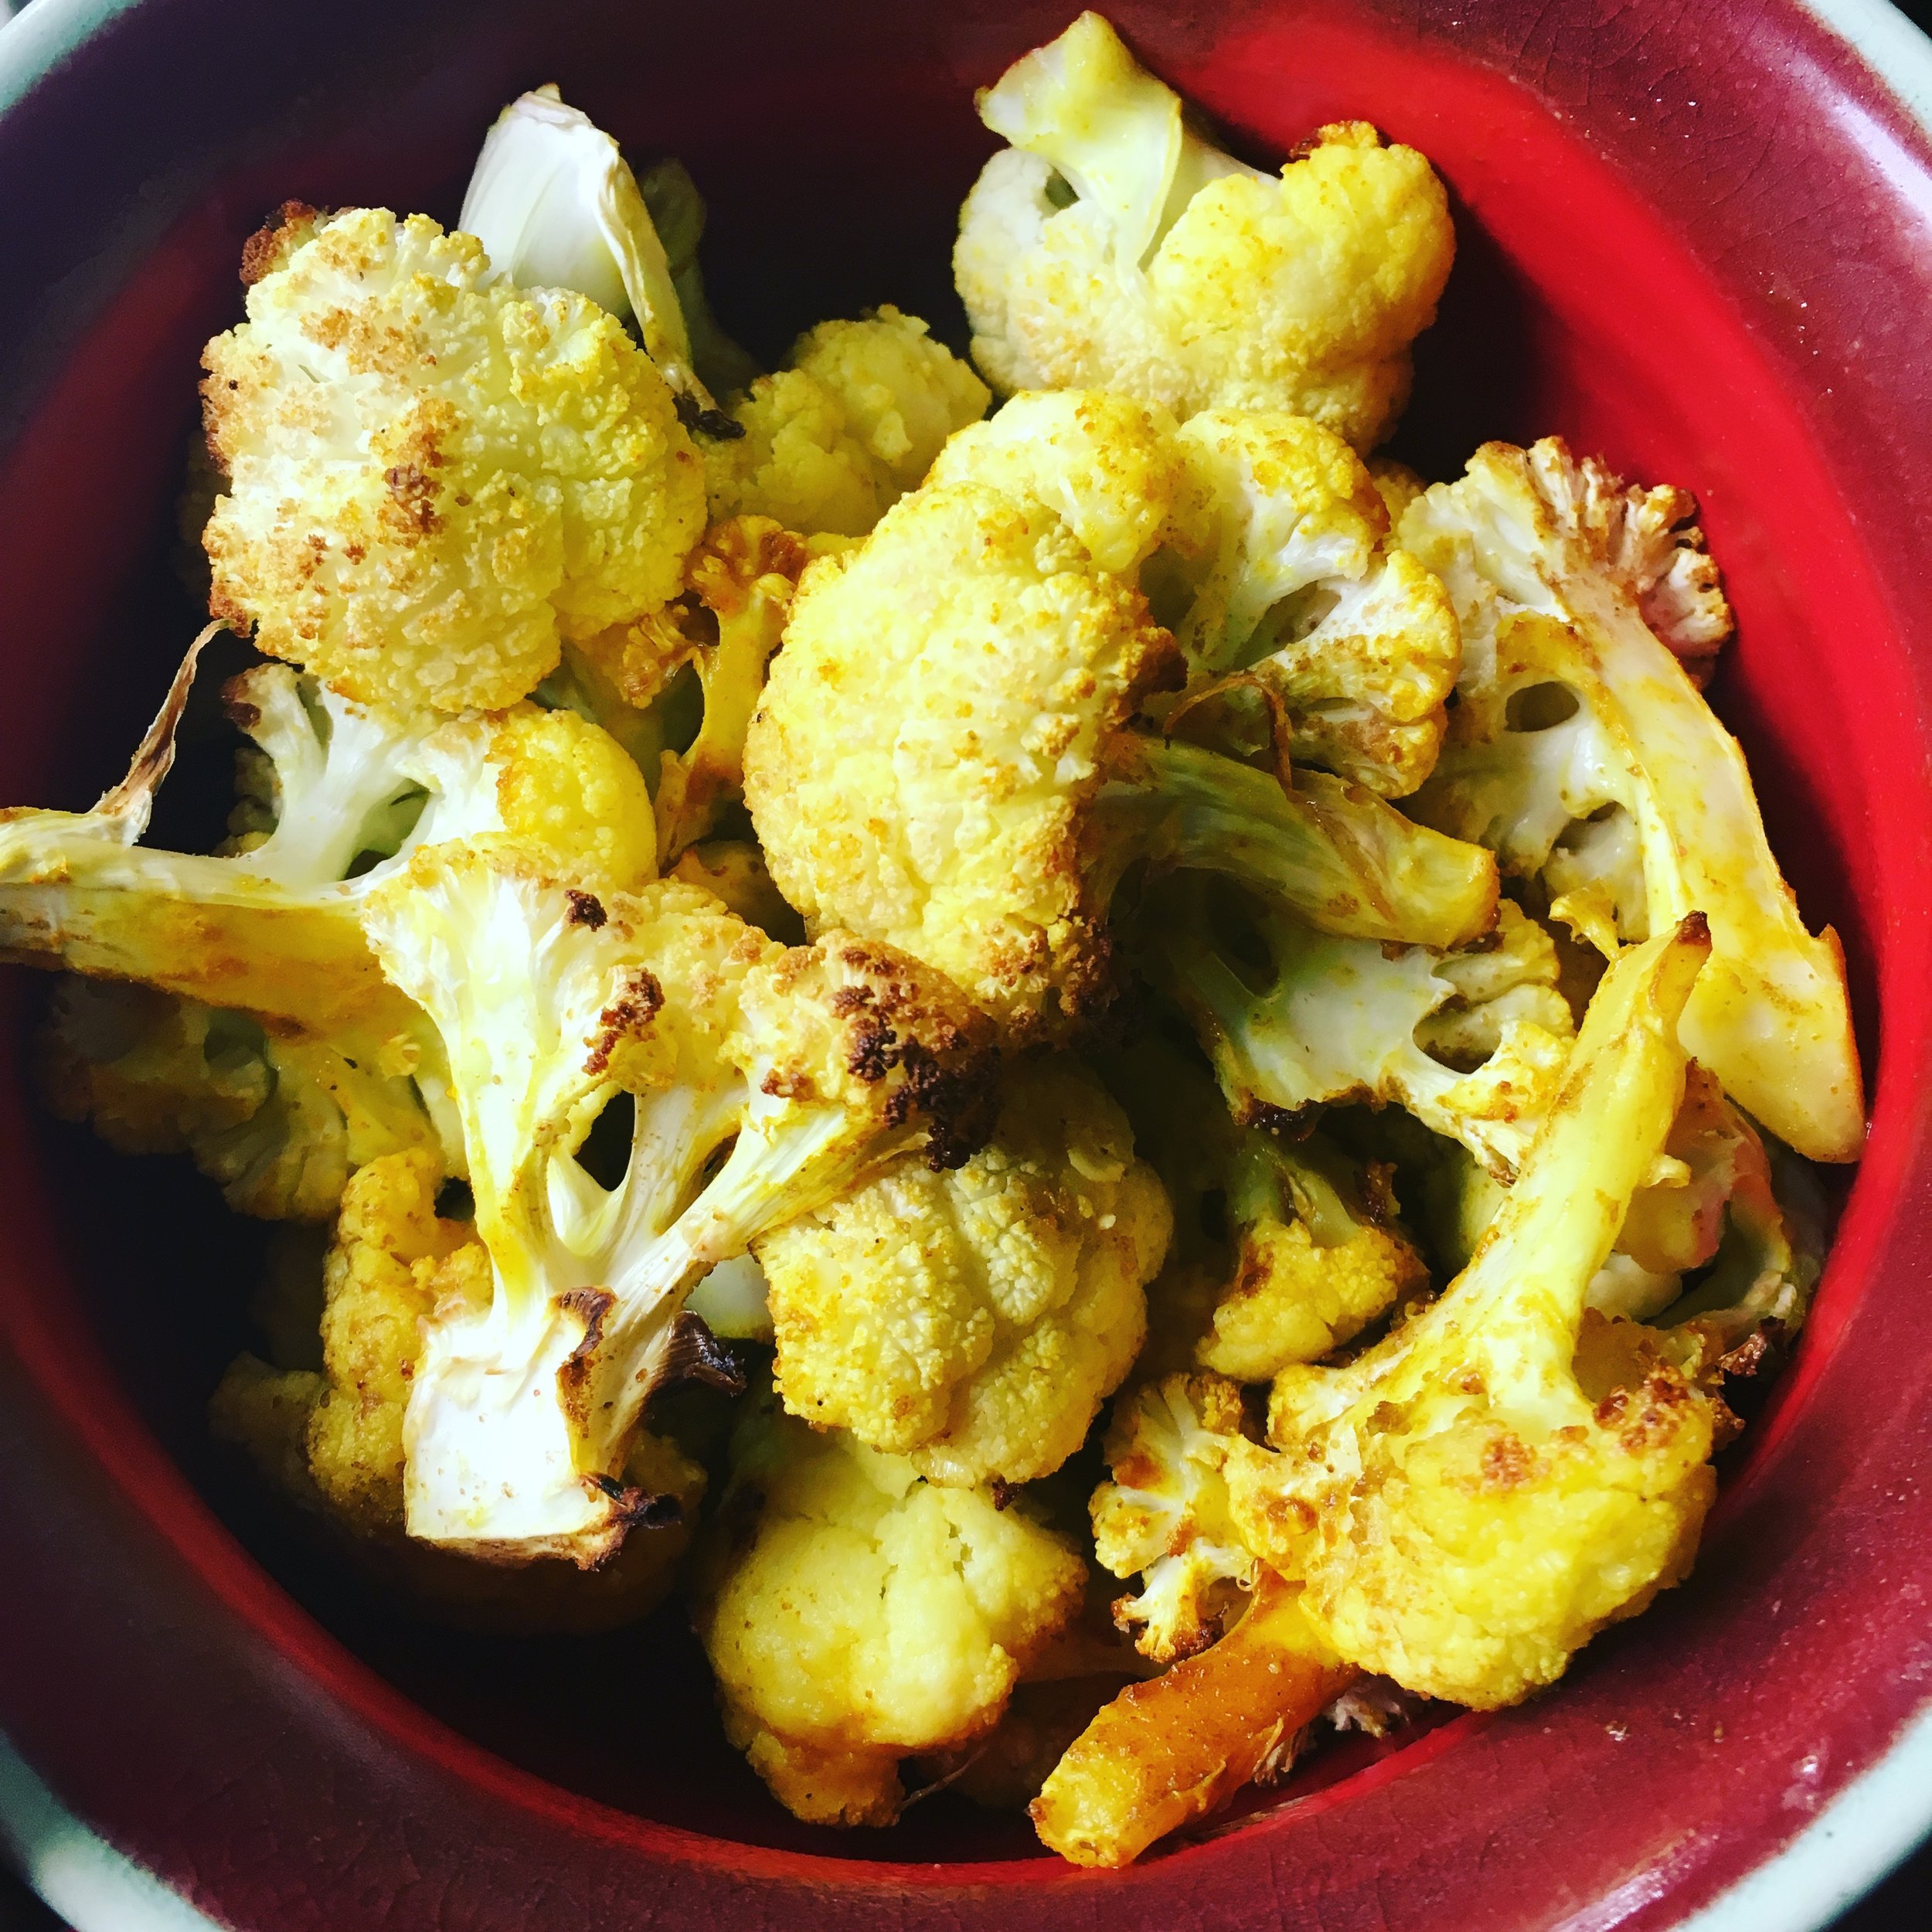
Turmeric Cauliflower

Cauliflower

Ok. Cauliflower seems to be all the rage as a grain substitute, and turmeric is on the hot list for its anti-inflammatory properties, and there's good reason why they are both so famous right now.  

It turns out that cauliflower is really versatile, but I love cauliflower the old fashioned way, just cut it, cook it, and munch on it.  A few fun facts are that it's part of the crucifer family, which includes broccoli, brussels sprouts, and cabbage; all of which are great for the liver, all of which are best eaten cooked due to goitrogenic properties that can interfere with thyroid function.  Cauliflower takes on a sweet quality when roasted, I love it!

Turmeric, is often found in curry powders, and has a special chemical, called curcumin, that is known for its anti-inflammatory benefits.  Plus it has an amazing color, which in general gives us a hint that it is super nutritious.  

I make about a head at a time, and eat some and then put it in the fridge to add color and depth to my other meals throughout the week.  It's also great eaten cold as a snack.  

Ingredients 

6 servings (roughly) 

1 head cauliflower

1 teaspoon turmeric 

1 tablespoon ghee or coconut oil 

sea salt and pepper to taste 

Directions (preheat oven to 375 and line a baking sheet with parchment paper) 

1) Chop cauliflower into little florets, I usually place the knife in halfway and twist to break off the florets so I don't make a ton of cauliflower crumbs.

2) Place cauliflower into a large mixing bowl.  

3) Melt tablespoon of coconut oil in a small saucepan.  

4)  Pour turmeric and coconut oil over cauliflower and mix well.  

5)  Pour mixture onto parchment lined baking pan.  

6) Place in oven for 40 minutes, check for doneness by sliding a fork through. 

Enjoy on salads, with veggie stir fries, really...anything.  

Sautéed Tokyo Turnips

tokyoturnips.JPG

If you are like most people....the idea of turnips isn't super appetizing.  I tend to think of Peter Rabbit stealing turnips from his neighbor (is that the right reference??), so maybe more food for rabbits than for people.  

However, Tokyo Turnips will change your mind, pretty much guaranteed.  These little bulbs of goodness have a sweet, juicy texture that are so darn delicious.  I sometimes just sauté them up as a snack because I don't want to mix their flavor with anything else.  Plus you can cook the greens, and sometimes I use them at separate times.  I love throwing the greens into a soup right before I eat it, they add some beautiful color and cook super quick in just boiled soup.  

Here is a basic recipe, but feel free to experiment with different cuts and you can roast them too!  

Ingredients 

1 bunch tokyo turnips (I prefer to look for small golf ball or smaller size turnips)

1 large pat butter, ghee, or coconut oil 

Salt and pepper to taste 

Directions 

1) Wash turnips and greens thoroughly.  They are pulled from the ground so tend to be a bit sandy.  

2)  Cut each bulb with greens in half.  

3) Heat a medium size sauté pan over medium heat. 

4)  Add a large pat of butter, ghee or coconut oil.  

5)  Place in tokyo turnips, cook each side for roughly 1 minute or until a fork slides nicely through the bulb.  

6)  Salt and pepper to taste

Enjoy! 

You can also play around with the bulbs this way.....

Tamari Ginger Chicken

IMG_4708.jpg

When I began cooking, this was one of the first recipes I learned when going over to eat at my former health coach's house, Molly. Thanks for the inspiration Molly!  It fits in with my love of asian flavors and simplicity. Chicken falling off the bone is one of my favorite things, especially in winter months where the ginger in this recipe adds a warming touch.  Of course, you can add as much or as little ginger as you like, or simply place large chunks and remove them before eating.  

This is a great recipe for cooking on a Sunday, or you can also place it in the crockpot over night and wake up and have a bit of this for breakfast!  

The directions below are for stove top cooking, but if you are using a crock pot, simply put all ingredients in, and let cook for at least 6 hours.  Read the directions before slicing all the ingredients (which is something I always neglect to do).  The directions include my preferred time to chop ingredients while other things cook! This recipe also works with sliced kale, added in the last 5 minutes of cooking.  

Tamari Ginger Chicken

Serves 4 

3-4 organic chicken legs, with skin and bone

1 tablespoon cooking oil (I prefer butter, coconut oil, ghee, or animal fat)

one medium yellow onion 

1/2 cup filtered water or broth

1 cup sliced crimini mushrooms 

2 large carrots sliced 

3 cloves garlic minced 

1 tablespoon ginger, minced 

3 tablespoons tamari

2 tablespoons mirin or rice wine (optional)

Directions

1) Take a large sauté pan, and place it over medium heat, wait until pan is warm.  

2) Place in cooking fat and melt.  

3)  Place in chicken and allow to begin cooking while you slice onions and mushrooms.  Flip chicken after a few minutes. 

4)  Add in onions, mushrooms, broth, tamari and rice wine if using.  Stir and cover.  

5)  Mince ginger, garlic, and slice carrots, add to pan.  Stir. 

6) Cover and allow to simmer for 45 minutes.  Check and stir periodically.  There should be a thin layer of liquid at the bottom, add more broth or water if it starts to dry.  

7)  Turn off heat and allow to cool slightly before serving. 

Cook for your family, or just for yourself to eat throughout the week!  Don't forget to save the bones for bone broth later ;)  


Summertime Gazpacho

Summertime Gazpacho 

Summertime Gazpacho 

It's September, and I'm trying to squeeze in this gazpacho recipe before tomatoes are gone for the winter!

Gazpacho originated from the Andalusia region of Spain, and is a soup, usually with a tomato base, that is served cold.   It has now evolved to take on many different forms, and it’s my recent summertime obsession. It is extremely refreshing to have on hot summer days.  It's also a perfect example of veggies that are available only in the summer months:  cucumbers, peppers, tomatoes, and basil.  All of these veggies love hot hot weather, and if you see them in winter, it means they come from somewhere south of the border. Which for me, means transportation costs and less flavor.  

Plus, remember, we are always trying to get variety into our diets, so when we eat seasonally, that's how we get it without thinking. 

Enjoy this super easy, simple and delicious recipe while you still can!  


Serves 2

2 cups tomatoes (any kind!) 

1 large cucumber

1 large red pepper

1 cup loosely packed basil

2 cloves raw garlic

1 T balsamic or wine vinegar

2 T extra virgin olive oil

Salt and pepper to taste


1)   Throw all ingredients into a blender, or place in a deep bowl and use an immersion blender.  Blend.

2)   Salt and pepper to taste!

3)   Serve with toast or crackers, or hard boiled eggs!

Broccoli Cream Soup

Vegetables are delicious.  Vegetable Cream Soup is even more delicious.  In this recipe, I've added some cashews for some healthy fat that helps with nutrient absorption and adds a bit of creaminess... it will be hard to believe that it's healthy.  You could definitely use this recipe and simply switch out some of the vegetables, and if you don't have bone broth, you can use water.  However, you know how much I love broth, both for added nutrients and for added taste.

A vegetable cream soup such as this is one of the simplest ways to get a ton of vegetables into our diet.   This soup is a more easily digestible form of vegetables, and you can mix and match as much as you want.  This is one of my favorite combinations, broccoli and whatever else I have in the fridge.  The following recipe is the base.  Enjoy and have fun exploring!

Ingredients (Makes 4 servings)

Gluten and Dairy Free
 
2 quarts liquid (filtered water or broth) 
One head broccoli, roughly chopped
One medium onion, roughly chopped
3 medium carrot sticks, roughly chopped  
3 cloves garlic crushed
1 cup cashews (soaked) 
Plus: Any vegetables that you have leftover in the fridge that you need to get rid of. Root vegetables work great.  
Salt and pepper to taste

Directions: 

1)    In a large sauté pan, sauté onions until translucent.  Throw in the rest of the vegetables and cook until soft.  
2)    Throw everything into a blender, add broth, cashews, a large pinch of salt and pepper and blend with center top piece off.  
3)    Taste and adjust salt and pepper.  
4)    Use a spatula to pour everything into a medium stock pot and heat until ready to serve! 
5)    Garnish with some olive oil or other nuts.  
6)    Freeze some if desired and save for a rainy day.


Coconut Squash Soup

You know the seasons are changing when, aside from the foliage reflecting hues of crimson, brown, and gold, the stands at your favorite grocery store or farmers market are bursting with these warm colors. This beautiful time of year brings all things warm and cozy, including delicious and warming recipes. One of my favorites? Squash! A vegetable, originating in Central America that was originally cultivated for its seeds, is now found in recipes around the world and a favorite thanks to its rich, sweet flavor!

Squash is a chi-tonic and warming food, which makes it medicinal to many areas of the body including the stomach, spleen, and large intestine. Packed with generous amounts of nutrients, these vegetables are a GREAT source of natural sweetness, carbohydrates (providing starch), and alpha and beta-carotenes. The unique carotenoid complex along with the significant amount of Vitamin C (about 1/3 cup of recommended daily value in every cup) makes them a winning choice with their high level of antioxidant support. They are also an excellent source of Vitamin A, Vitamin B6, manganese, and fiber.

Now, would you have ever thought these superfood vegetables would have been a part of the melon family? Well… they are. Squash actually belongs to the melon and gourd family or Curcurbitaceae. A wide variety of squash including acorn, butternut, pumpkin, kabocha, and others accompany many other family members including cucumber, zucchini, pear, watermelon, and so on. Feeding humanity for centuries, the origin of this families many members, span the world.

Unlike summer squash, winter squash is eaten when fully matured. They are available from August through March, but are best when in their peak season- October through November. When choosing yours, look for one heavy for weight with a firm rind. Soft rinds can be an indication that the squash is watery and has little to no flavor. A good squash will be overflowing with delicious, rich flavor. Also check for soft spots or signs of decay, for these blemishes can manifest and spoil the entire vegetable.

Another unique characteristic of squash is their ability to act as the main starch component of a meal. With about 90% of its calories coming from starch, we recognize squash is a very starchy vegetable. Now, I know what you may be thinking. Isn’t that… maybe... not the greatest? On the contrary! Research shows that not all starch is the same and with this starch in particular, there are great health benefits including anti-inflammatory, antioxidant, and insulin-regulating properties. Remember, it is important to eat these vegetables with a healthy fat to ensure maximum nutrient absorption! I recommend organic grass fed butter and coconut oil….yum.

The transition into the Autumn and Winter seasons, bring a chilly breeze, cozy sweaters, and kitchens filled with captivating aromas. That means… it’s time to head to the kitchen! Check out Tammy's favorite recipe below! Some of my favorites include Spaghetti Squash, Beet & Brussels and Roasted Spaghetti Squash with Kale. Take a look at these other fall recipes and try experimenting with different flavors at home!

Written by Ashley Green for The Nourished Belly

Fall is the time for winter squash.  These really are such a treat.  For this soup, you can use any squash, but Kabocha is one of my favorites.  You can even mix them together!  I prefer to steam kabocha, since it can be dry if roasted.  However, if using another squash such as butternut or acorn, roasting will bring out a sweetness that will be lost in steaming.  Simply cut the squash in half, place on a baking sheet face down, and bake for approx 40 minutes!

Coconut Squash Soup 

Serves 4

Ingredients

Coconut Squash Soup

1 medium squash (butternut, kabocha, acorn, or delicata work great!)

1 quart bone broth/veggie broth/water 

1/2 can Native Forest Coconut Milk 

1 medium onion

1/2 teaspoon minced ginger 

sea salt to taste 

pinch of cinnamon (optional)

handful of cilantro/parsley and pumpkin seeds for garnish (optional)

Directions

1)   Cut Kabocha squash in half , and take out seeds.  Put them in the compost.

2)   Cut into large cubes, you’ll blend everything together later, you just want the pieces to cook quicker.

3)   In a large pot, place kabocha cubes with 1 inch of water.  Put over medium heat.  Cover.

4)   When the water starts to steam, turn down heat and cook for 10 minutes or until a fork slides through easily. 

5)   While the squash is steaming, slice onions into slices and heat a sauté pan on medium heat. 

6)   Place coconut oil or butter in the pan and put in onions and minced ginger.  Sauté for 4-5 minutes or until onions are translucent.

7)   Once kabocha is finished, add in onions, ginger, chicken broth and the coconut milk. 

8)   Using an immersion blender, blend until smooth. 

9)   Simmer for another 10 minutes.  Add filtered water if you desire a more liquid consistency, or more coconut milk. 

10)        Add salt to taste and serve with cilantro/parsley or pumpkin seeds


Sources

- Wood, R., Pitchford, P., Markel, P. (2010). The New Whole Foods Encyclopedia: An A to Z of Selection, Preparation and Storage for More Than 1000 Common and Uncommon Fruits, Vegetables, Grains, and Herbs. New York, NY: Penguin Books.

- Murray, M., Pizzorno, J., Pizzorno, L. (2005). The Encyclopedia of Healing Foods: The Most Comprehensive, User-friendly A to Z Guide Available on the Nutritional benefits and Medicinal Properties of Food. New York, NY: Atria Books.

- Organic For All, Inc. The Cucurnitaceae Family. Retrieved September 22, 2014 from http://www.organicsforall.org/vegetables5.htm

- Drummond, R. (2013, Nov 11). Roasted Spaghetti Squash with Kale. Retrieved from http://thepioneerwoman.com/cooking/2013/11/roasted-spaghetti-squash-with-kale/

- J Dean. (2013, Oct 5). Spaghetti Squash, Beets & Brussels. Retrieved from http://www.deliciouslivingnutrition.com/spaghetti-squash-beet-brussels/

- George Mateljan Foundation. Squash, Winter. Retrieved September 22, 2014 from http://www.whfoods.com/genpage.php?tname=foodspice&dbid=63

How to Make Bone Broth

If you want ONE thing you can do to improve your health….this might be it.   Save your chicken bones.  Make your own stock.  Bone broth is one of the most amazing foods you can add to your diet.  Truly.

bone broth

Traditionally, bone broth has been used throughout cultures as an ailment for the weak and the sick, and throughout culinary traditions as a way of adding flavor and depth to a dish.  It’s a win/win!  In ancient cultures, bones and organ meats were prized more than meat itself.  They are the most nutrient dense parts of an animal, and therefore, the most nutritious for us.

Benefits of Bone Broth

  • High in Minerals:  Due to the current food supply and the American state of health, most people are deficient in minerals.  Minerals are just as important as vitamins to our daily bodily functions.  Bones are a power house of minerals, and through prolonged simmering, we are able to extract all of these precious nutrients.  Thomas Cowan, author of A Fourfold Path to Healing, suggests that adding bone broth to our diet is the fastest way to rebuild our mineral deposits.
  • An Important Source of Gelatin: Gelatin is extracted collagen and an extremely soothing and nourishing food.  It is an excellent digestive aid and it’s extremely healing to our gut, our nervous system and for our entire body.  This is the original reason that jello is served in hospitals.  Patients were served a gelatin based food, but in the words of Jessica Prentice, worker owner at Three Stone Hearth, the jello served nowadays to patients is a “toxic mimic” of tradition.
  • High in Protein:  Included in the large amino acid profile of bone broth are glycine and proline.
    • Glycine is necessary in creating glucose when we are in need of more energy and is vital in supporting our detoxification pathways (thus, cleansing with only bone broth is a great idea.)
    • Proline is essential for the production of collagen, which helps us maintain healthy skin, bones, ligaments, tendons, and cartilage.


Making Your Own Bone Broth

Making your own broth is less time consuming than you might think, and if you have the proper tools (i.e. a crock pot!) it is extremely simple.  First off, save your bones in the freezer.  Of course, quality always matters, so at the very least you should be buying organic meats with the bone.  You can also go to the butcher and ask for bones, they are pretty inexpensive for the amount of nutrition that they provide.

Once you have a nice bag of bones, you are welcome to mix them, but I usually separate chicken from other meats due to flavor.  Place them in a large stock pot and cover with water (preferably filtered) and add a splash of apple cider vinegar.  The vinegar helps to pull the minerals out of the bones.

Temperature and simmering length are important.  The broth should be kept at a simmer, too high of heat will destroy the gelatin.   I personally leave the pot covered on a low flame over night and when I am out of the house.  The only incident I’ve run into is when I left a window open and the flame went out.  Another option is to leave the stock pot in the oven on 200.  However, if you have a crock pot, you don’t need to worry about any of this!  A crock pot has literally changed the way I cook in the kitchen, so I highly recommend you get one.  They are inexpensive and for busy people, they are invaluable.

Ingredients: (Makes roughly 3-4 quarts)

1-2 lbs of bones 

2 tablespoons apple cider vinegar 

1 medium yellow onion, roughly chopped 

4 carrots (you can include tops) roughly chopped 

4 stalks celery, roughly chopped

2 bay leaves 

Directions: 

1) Place the bones at the bottom of a stockpot or Crock-Pot, covering the bones with filtered water.

2) Add the apple cider vinegar. The vinegar will help to pull the minerals from the bones.

3) Bring the broth to a boil and then reduce to a simmer.

4) Follow the cooking times below: Bones should be easily crushed, this means you’ve extracted as much as you can out of them!

 Fish (keep the fish heads!): no more than 6 hours

Chicken: 12–24 hours

Lamb and goat: 36 hours

Pork and beef: 36–48 hours

5) For the last 4 hours of cooking, add the onion, carrots, celery, and any other vegetables of your choosing! Using a strainer, funnel the broth into jars. Freeze some (label with the date and kind of broth) and keep some in the fridge for immediate use! 


If the bones you are using have a nice amount of collagen and you've kept it at a nice low temperature, the broth should gel nicely when cooled.  This is a sign that it is gelatin rich.  Great job!

So get started!  Start saving your bones!  Or get a whole chicken and use the carcass.  I just used the turkey carcass to make an amazing stock….the holidays are a great time to try it out!

References:

Cowan, Thomas.  (2004) The Fourfold Path to Healing. United States; New Trends Publishing

Fallon, Sally.  (2000, Jan 1)  Broth is Beautiful.  Wise Traditions. Retrieved from http://www.westonaprice.org/food-features/broth-is-beautiful

Prentice, Jessica. (2006) Full Moon Feast; Food and the Hunger for Connection. Vermont; Chelsea Green.